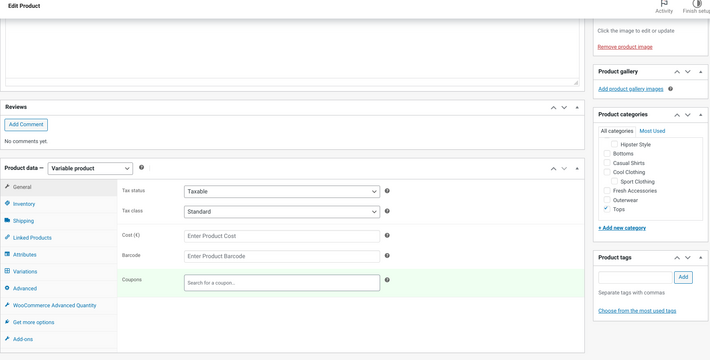
Oliver pulls in your barcode data directly from WooCommerce. This can be a UPC, EAN, or any numerical 2D barcode you generate yourself.
As long as you have a barcode scanner and your products have a valid barcode reference in your WooCommerce shop, you will be able to search products using their barcodes and add them directly to cart in POS and Kiosk.
If you don't have a scanner yet, check out the Oliver Barcode Scanner here.
When you install the Oliver Plugin, you will see a barcode field under products in WooCommerce. If you populate that field, you will be able to scan the code in the POS!
For barcodes to function in Oliver POS and Kiosk, the barcode data must be stored in one of two fields in the WooCommerce product page:
Inventory --> SKU (this is a default WooCommerce field)
General --> Barcode (additional field added by Oliver POS)
NOTE: If you are using a barcode management plugin, be sure that the plugin reflects barcode data back to one of the above fields. Many such plugins store barcode data separately, and are therefore not compatible with Oliver.

Once you have a barcode added, be sure to save the changes and close any open instances of Oliver before relaunching Hub and Register. Your new barcodes will be pulled in when we sync your shop!
💡 Tip: If you want to add barcodes in bulk, export a CSV of your products from WooCommerce. In the CSV you will see the barcode field - you can input all the barcodes in the CSV and import it back to WooCommerce.
Once your barcodes are synced from WooCommerce, you can scan products from the Home screen in the Register to add them directly to the cart.
Having issues with barcode scanning? Check out this article.