NOTE: Product Modifiers are available on our Pro Plan and above. To find out more about our pricing and feature breakdown, please check out our pricing page!
With Oliver product modifiers, the sky is the limit. There are four types of modifiers: radio buttons, checkboxes, number fields, and text fields. You can apply them to any simple or variable product that you have set up in WooCommerce.
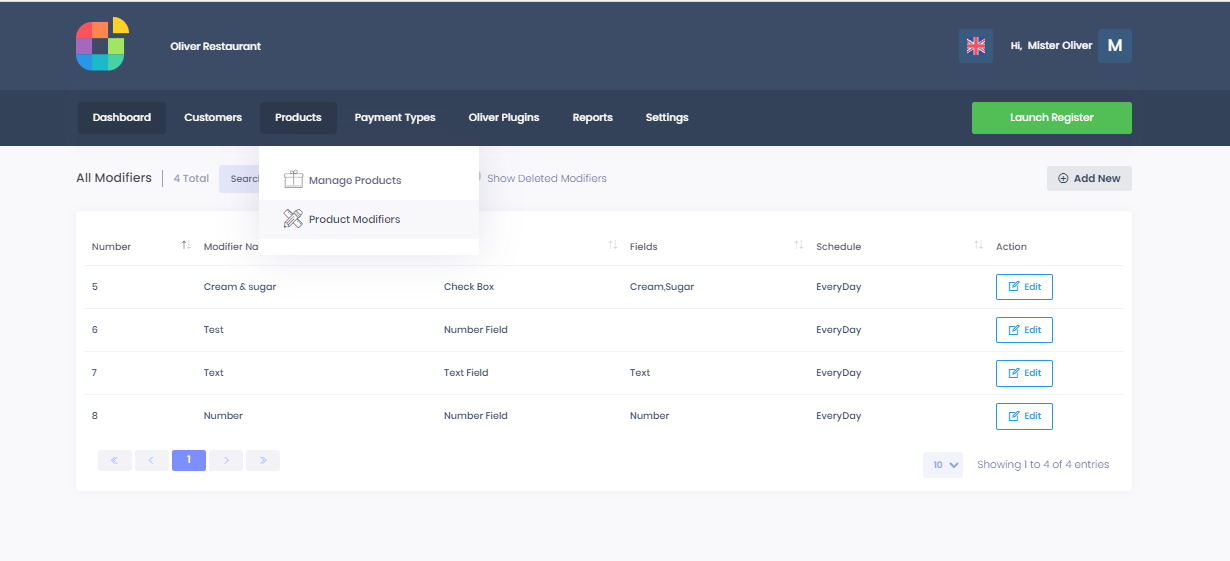
To set up and manage your product modifiers, navigate to Oliver Hub --> Products --> Product Modifiers:
Together, we'll set up each type of modifier, starting with radio buttons. Radio buttons are mutually exclusive, meaning that only one option can be selected at a time.
This modifier is going to be applied to a latte product, so we're going to set up a "type of milk" radio modifier, entering that text for the modifier title, label name, and description (although these can of course be different).
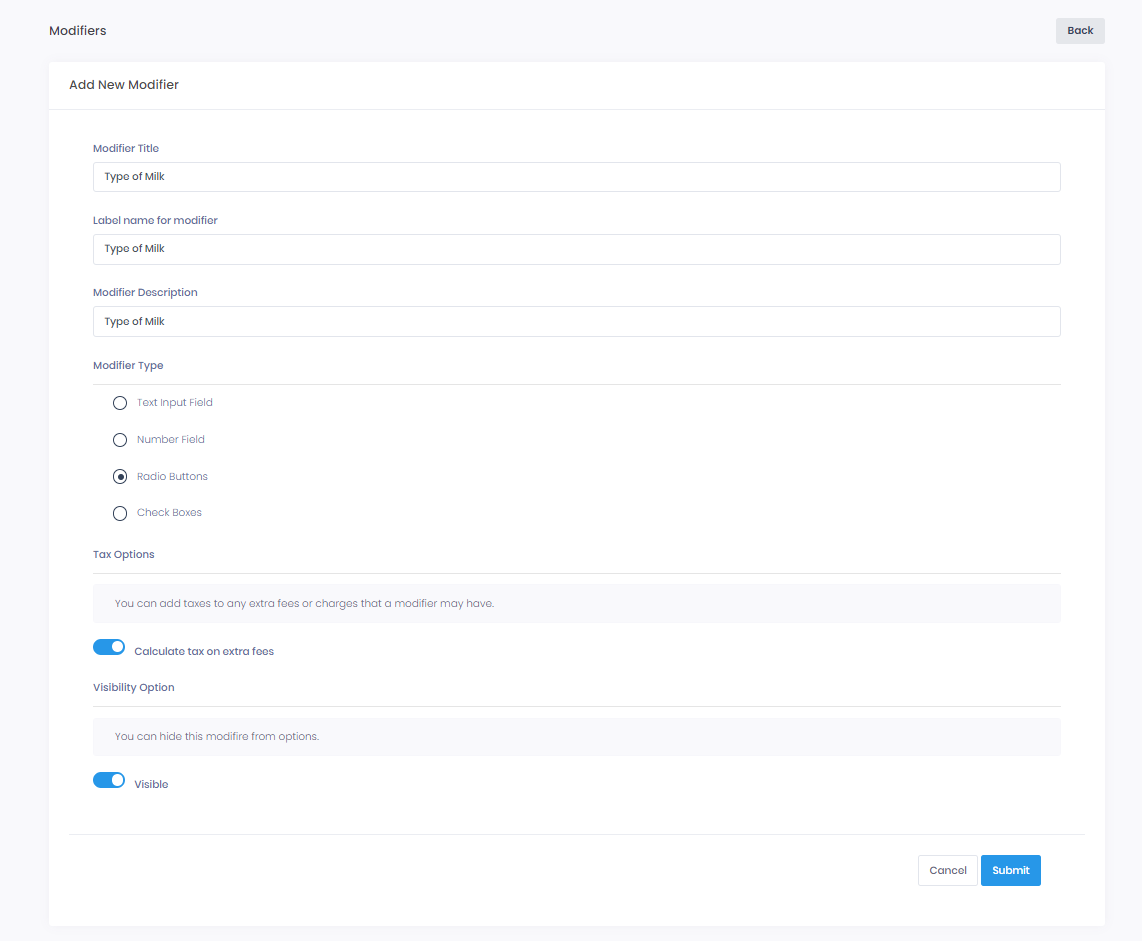
I can go back and modify these fields at any time in the General Settings of the modifier in question.
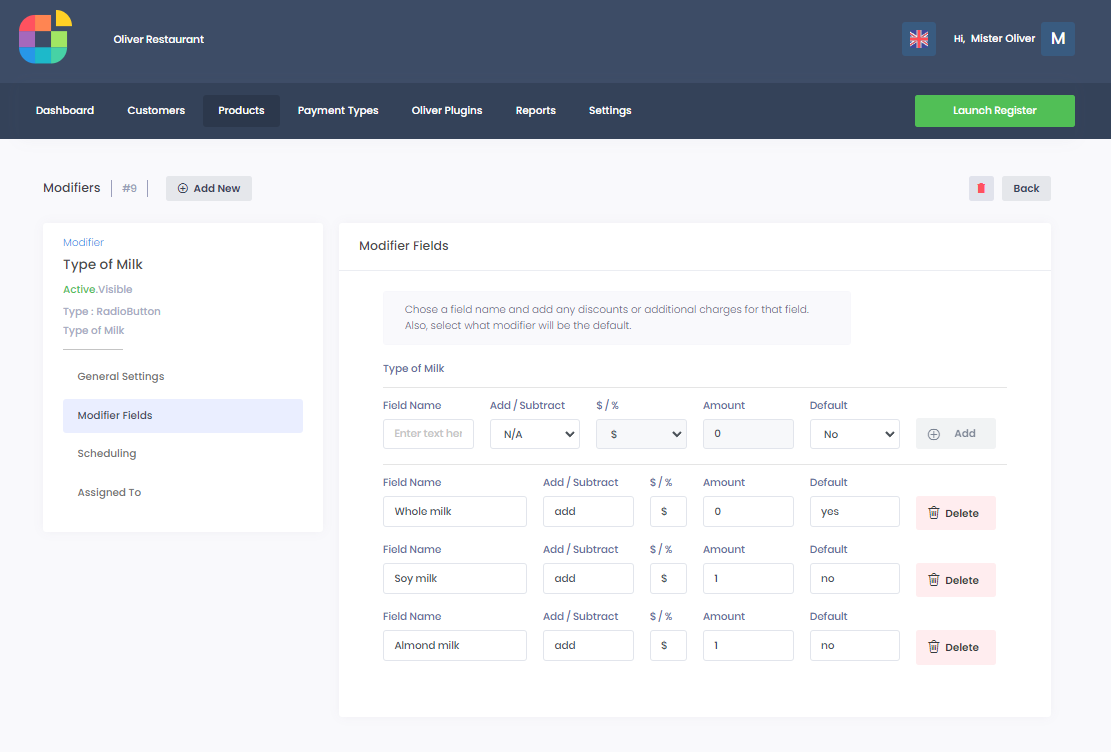
Now, I will proceed to the Modifier Fields to actually create radio options, which will of course be mutually exclusive. I have also added fees (which can be fixed or percentage-based) to two options.
NOTE: I can add a discount instead, or just leave the amount as "0" as in the case of the "whole milk" option.
A super cool feature exists in the Scheduling tab. I can actually choose when the modifiers in question are displayed. You can either set the modifier to repeat every day at a certain time, or have it be available for the next fixed interval (24 hours, 7 days, 30 days, etc.).

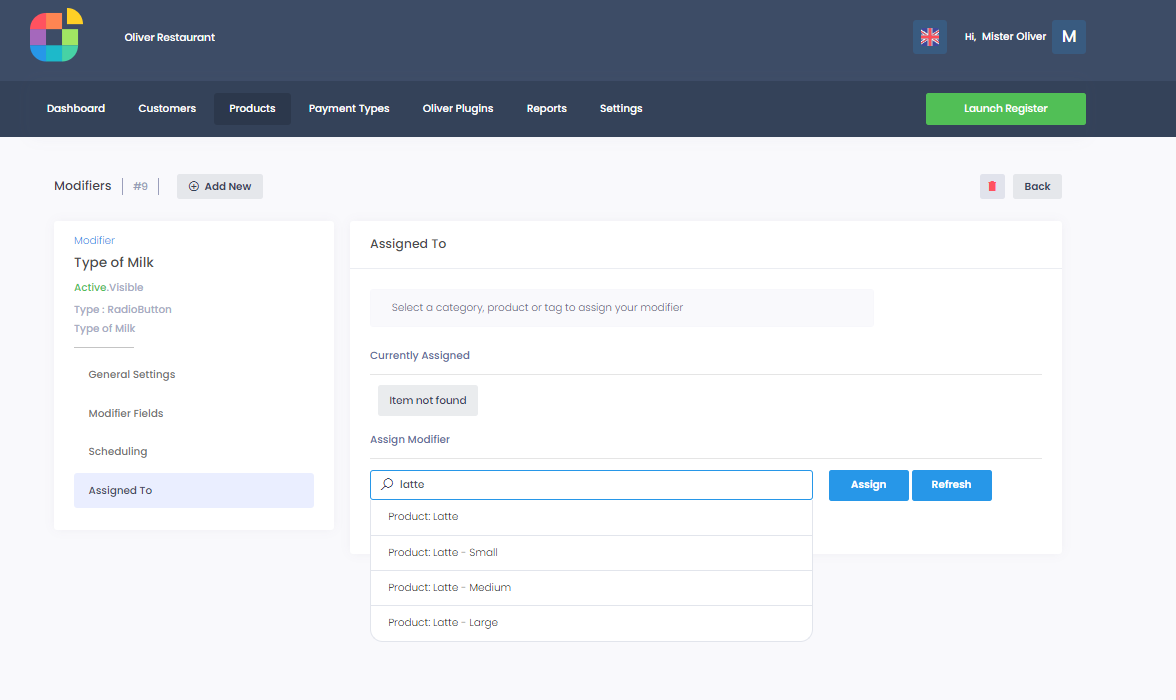
Next, in the Assigned To tab, I am going to apply these fields to each variant of the latte variable product I have. Do note that I can't just apply the modifier to the mother product. Instead, I will have to specify each variant that I want the modifier to be available for (small, medium and large latte variants).
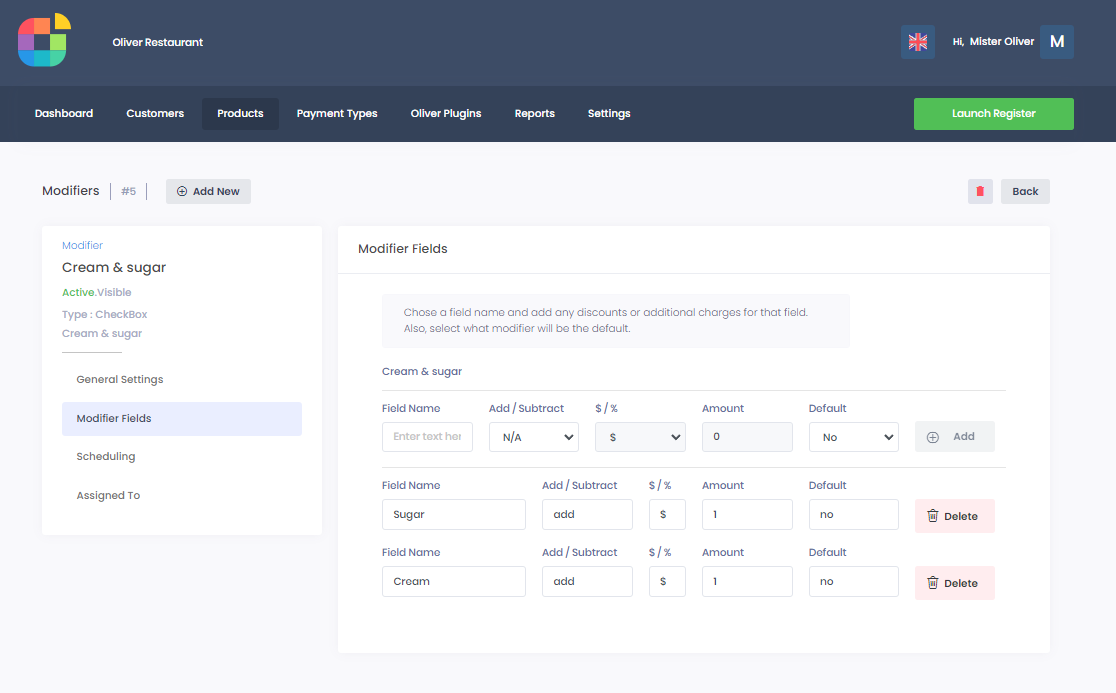
We can now add a new modifier for checkboxes the same way we did for radio buttons. Checkboxes work similarly to radio buttons, except they are NOT mutually exclusive. You can have multiple options selected at a time.
Once I am at the Modifier Fields tab, I will add cream and sugar as two checkbox options. Both hae a fee attached.
And once I have configured when the modifier is available in the Scheduling tab and applied it to the latte product in the Assigned To tab, we are in business!
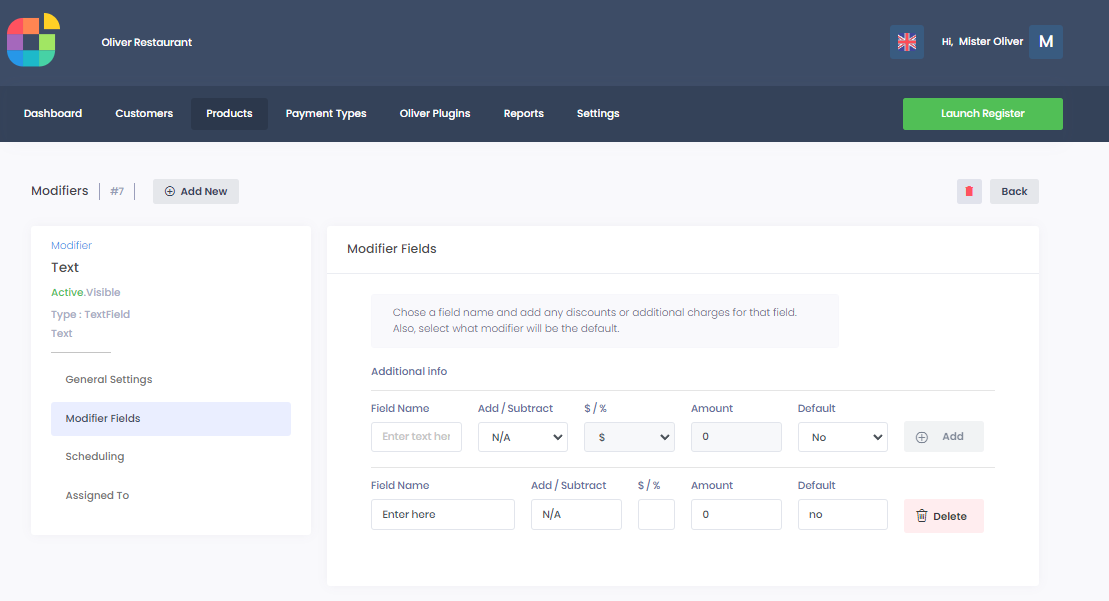
Let's add a text input field modifier now. This one works a little differently from the radio and checkbox modifiers in that there are NOT options that can be pre-selected.
Instead, this modifier lets you introduce a field that you can type anything into, and then apply a fee or discount if the field is filled in. Or, as in the case below, you can select "N/A" and not apply a price change.
You know the drill by now. Once I have configured when the modifier is available in the Scheduling tab and applied it to the latte product in the Assigned To tab, we are good to go.
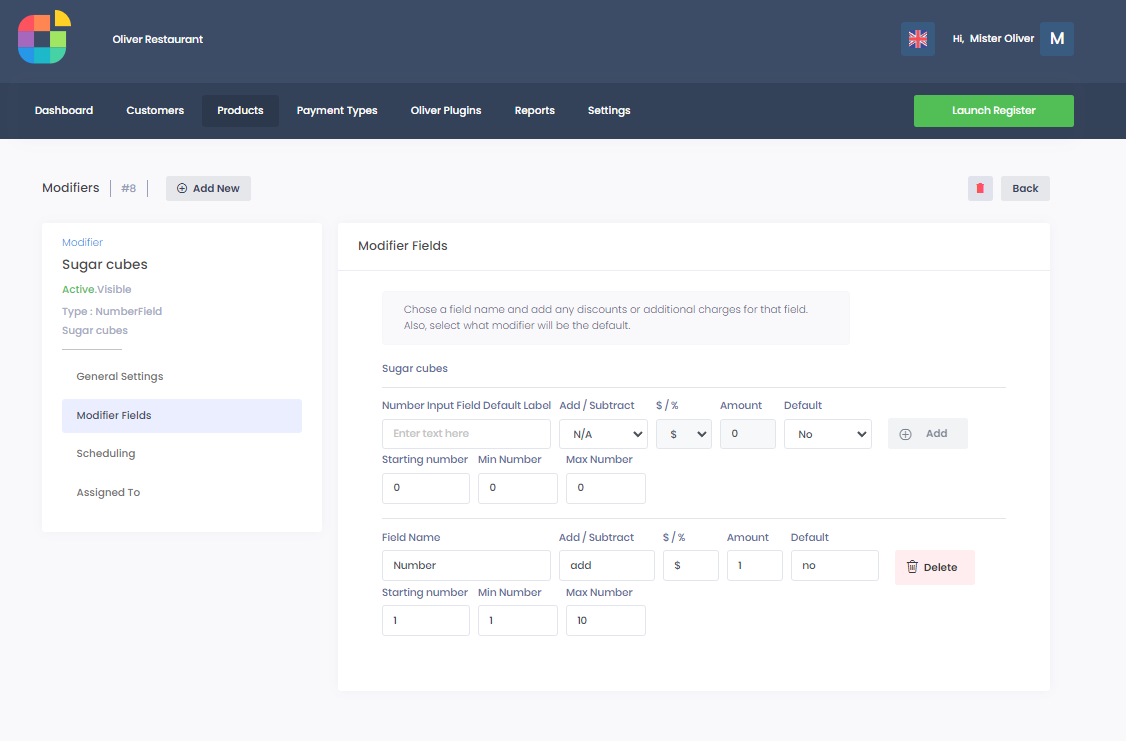
The number field modifier works much the same way as the text input field modifier in that both are input fields.
With the latte example product, I am going to pop in "number of sugar cubes" in general settings and then configure the modifier fields. Here, in addition to entering the field name and deciding whether to add a fee or discount, I can select a starting number, minimum number, and maximum number for the number input field.
Now that we've configured scheduling and product assignment for this final modifier, let's go check out what all these modifiers look like in the Oliver Register!
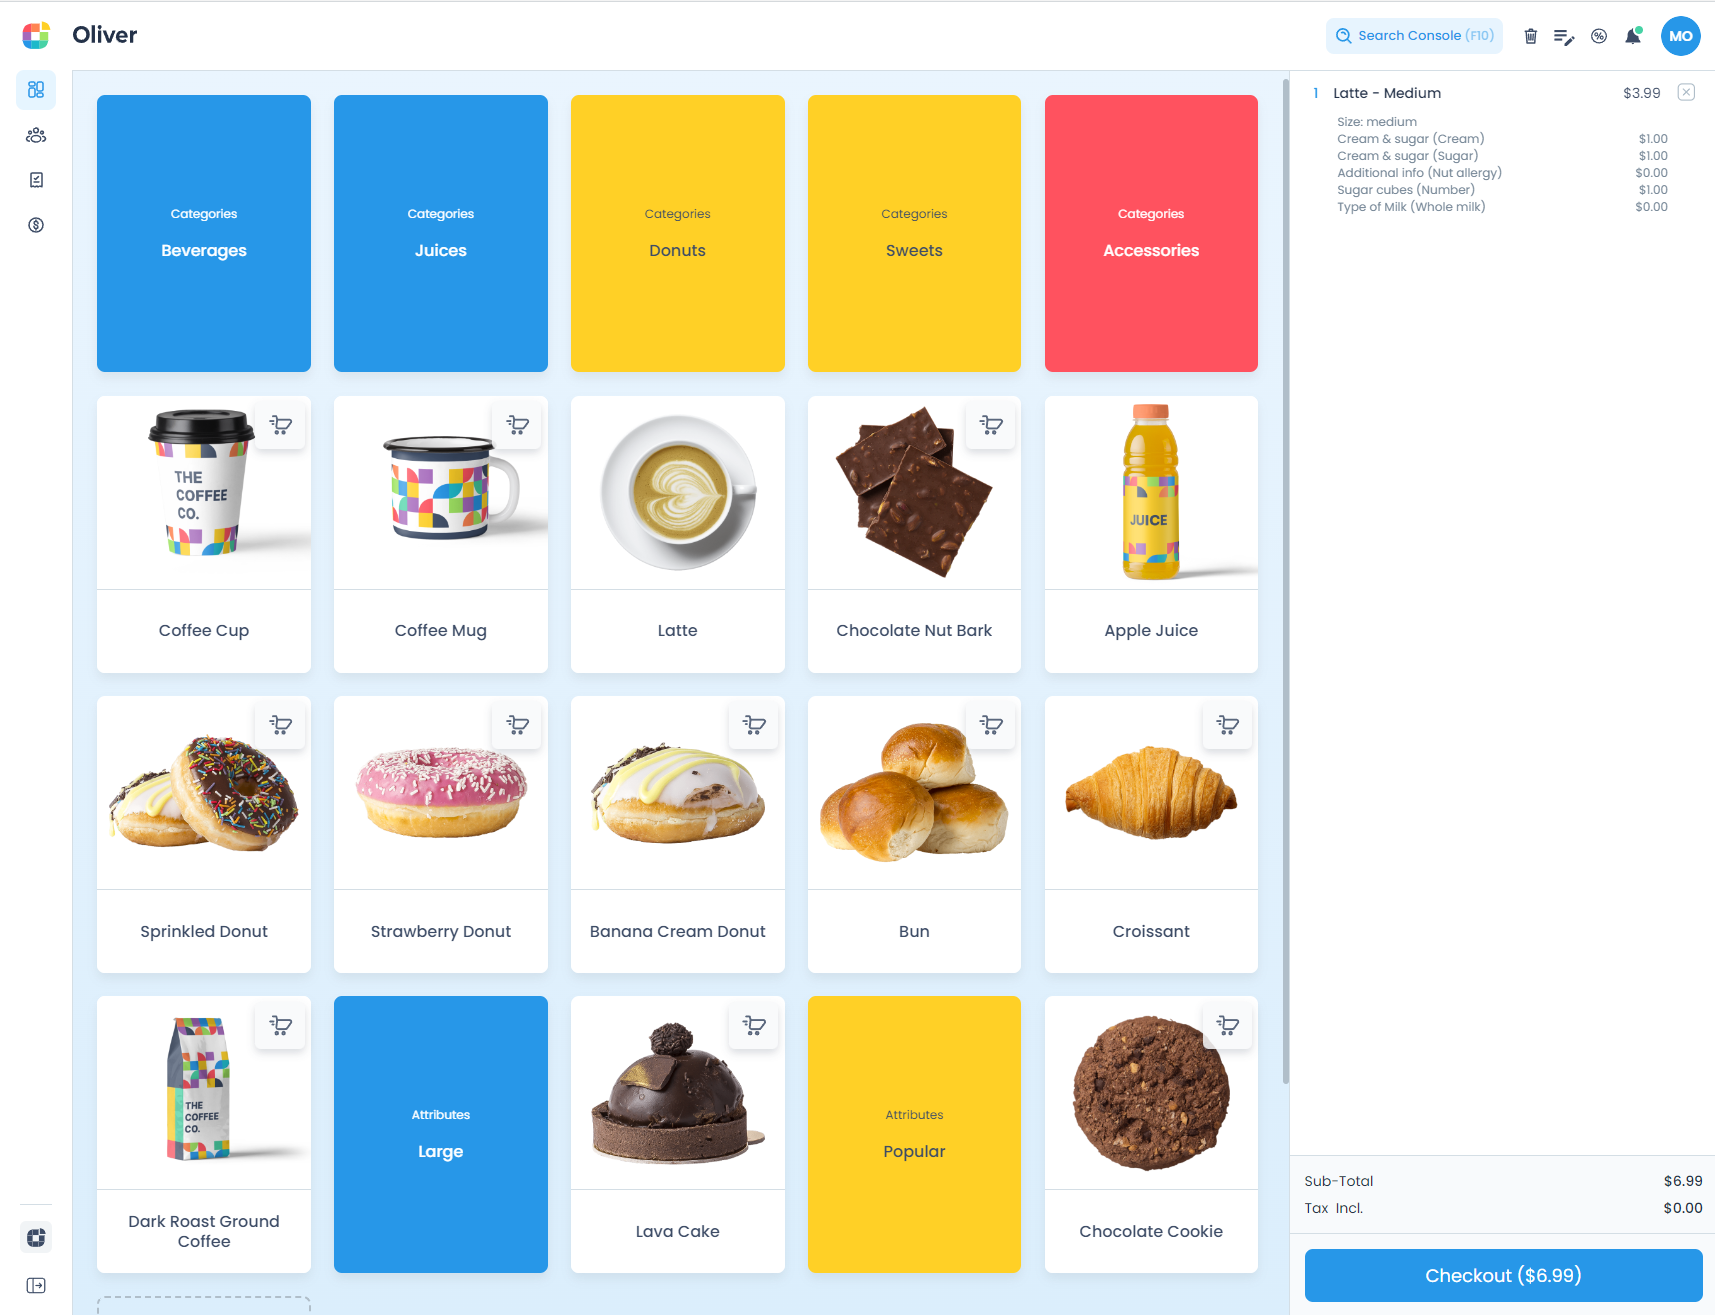
Here is what product modifiers look like in the Oliver Register, specifically in the product page for the latte variable product.
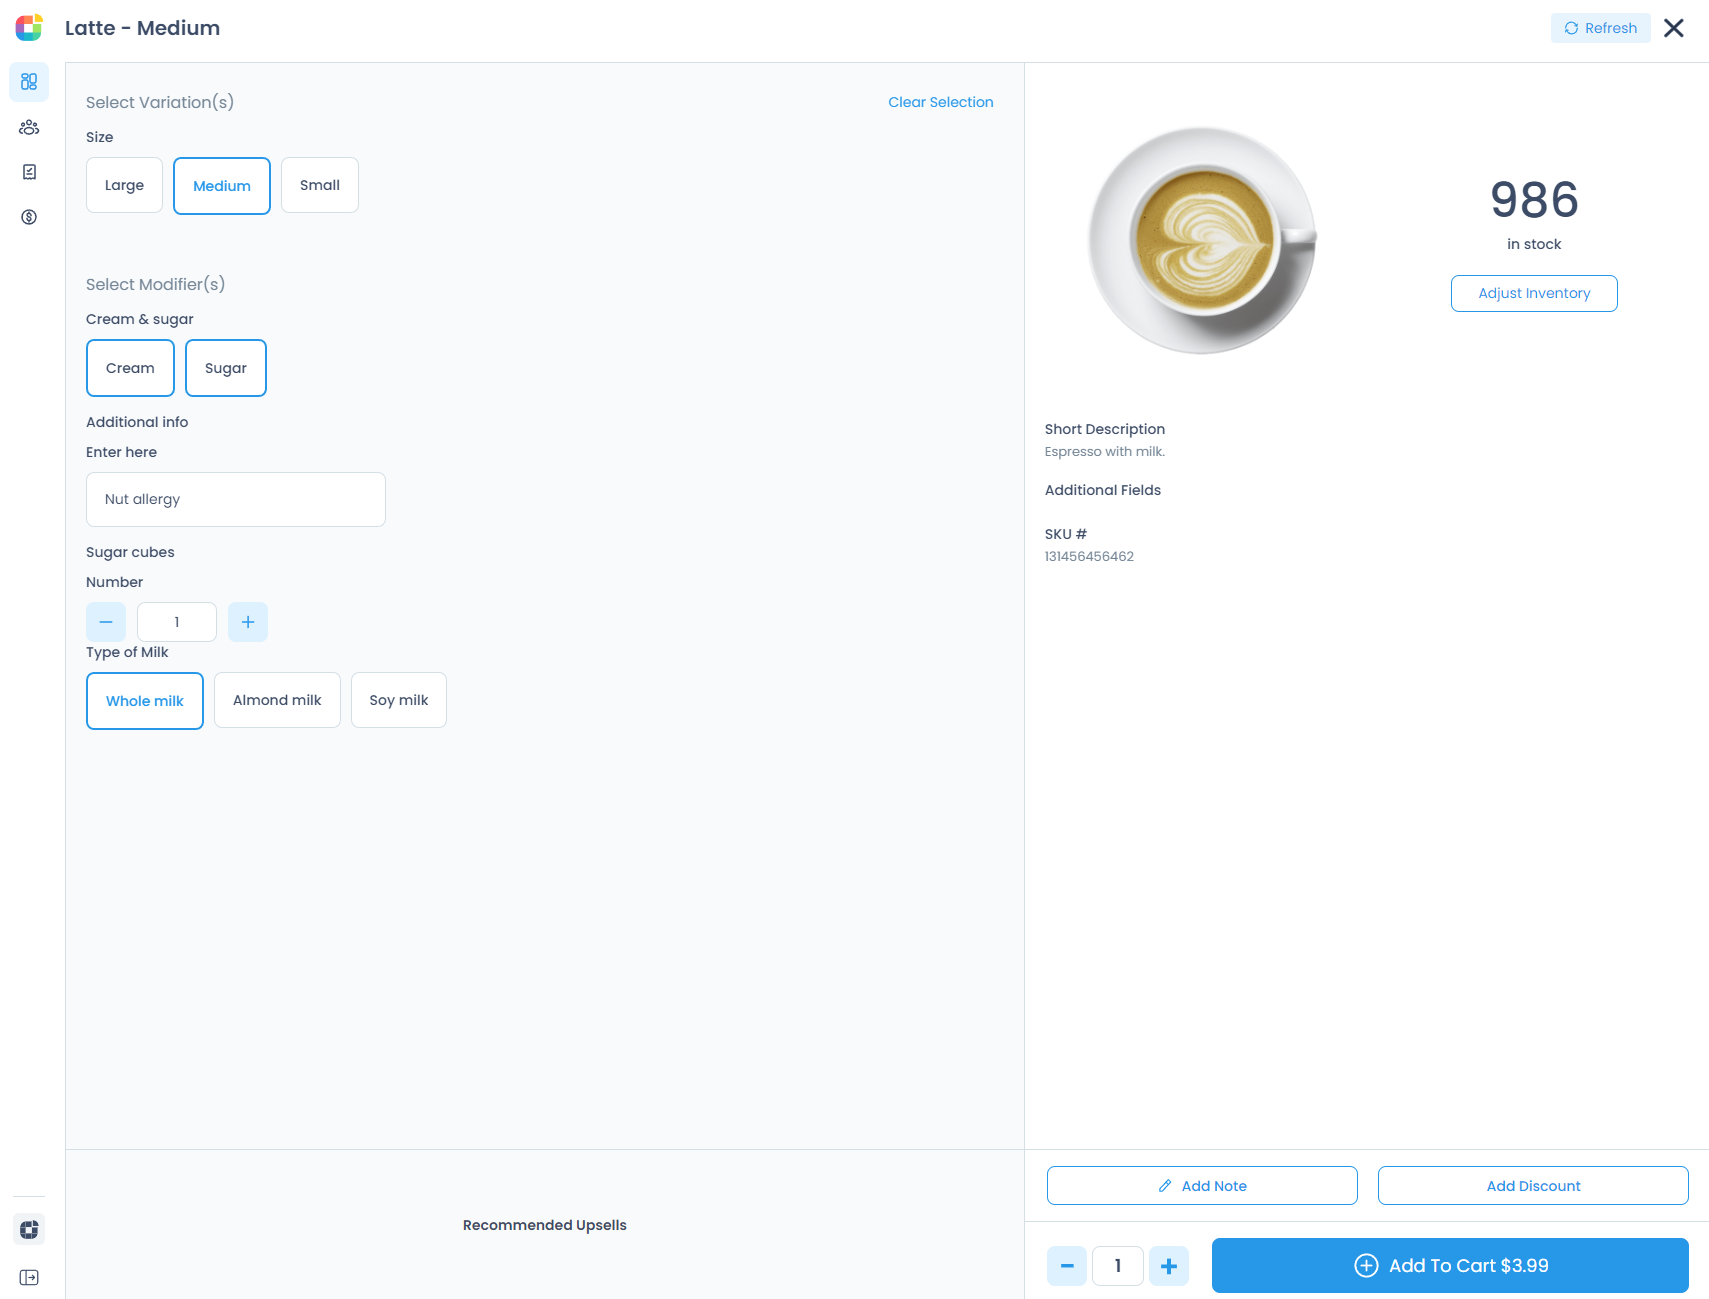
Once I add the product to cart, after selecting the desired modifier options, the appropriate fees will be charged.
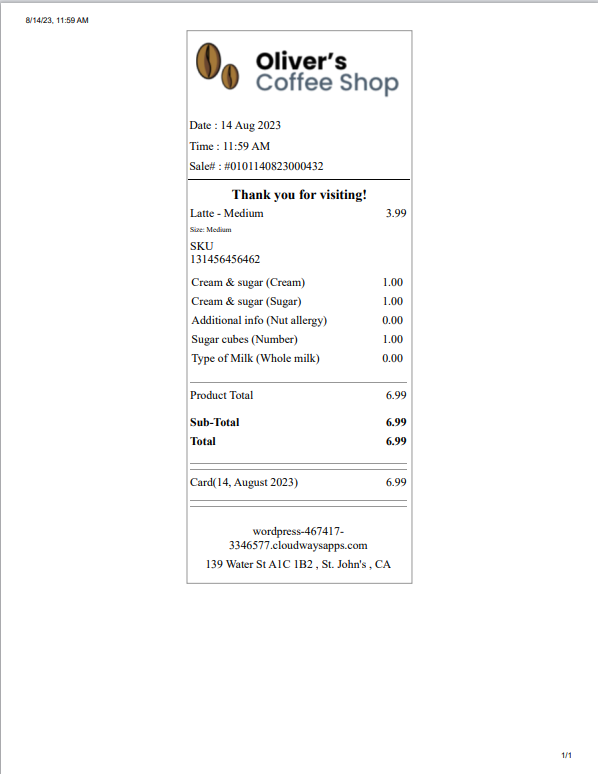
The selected modifier options and associated fees will also show up in the receipt.
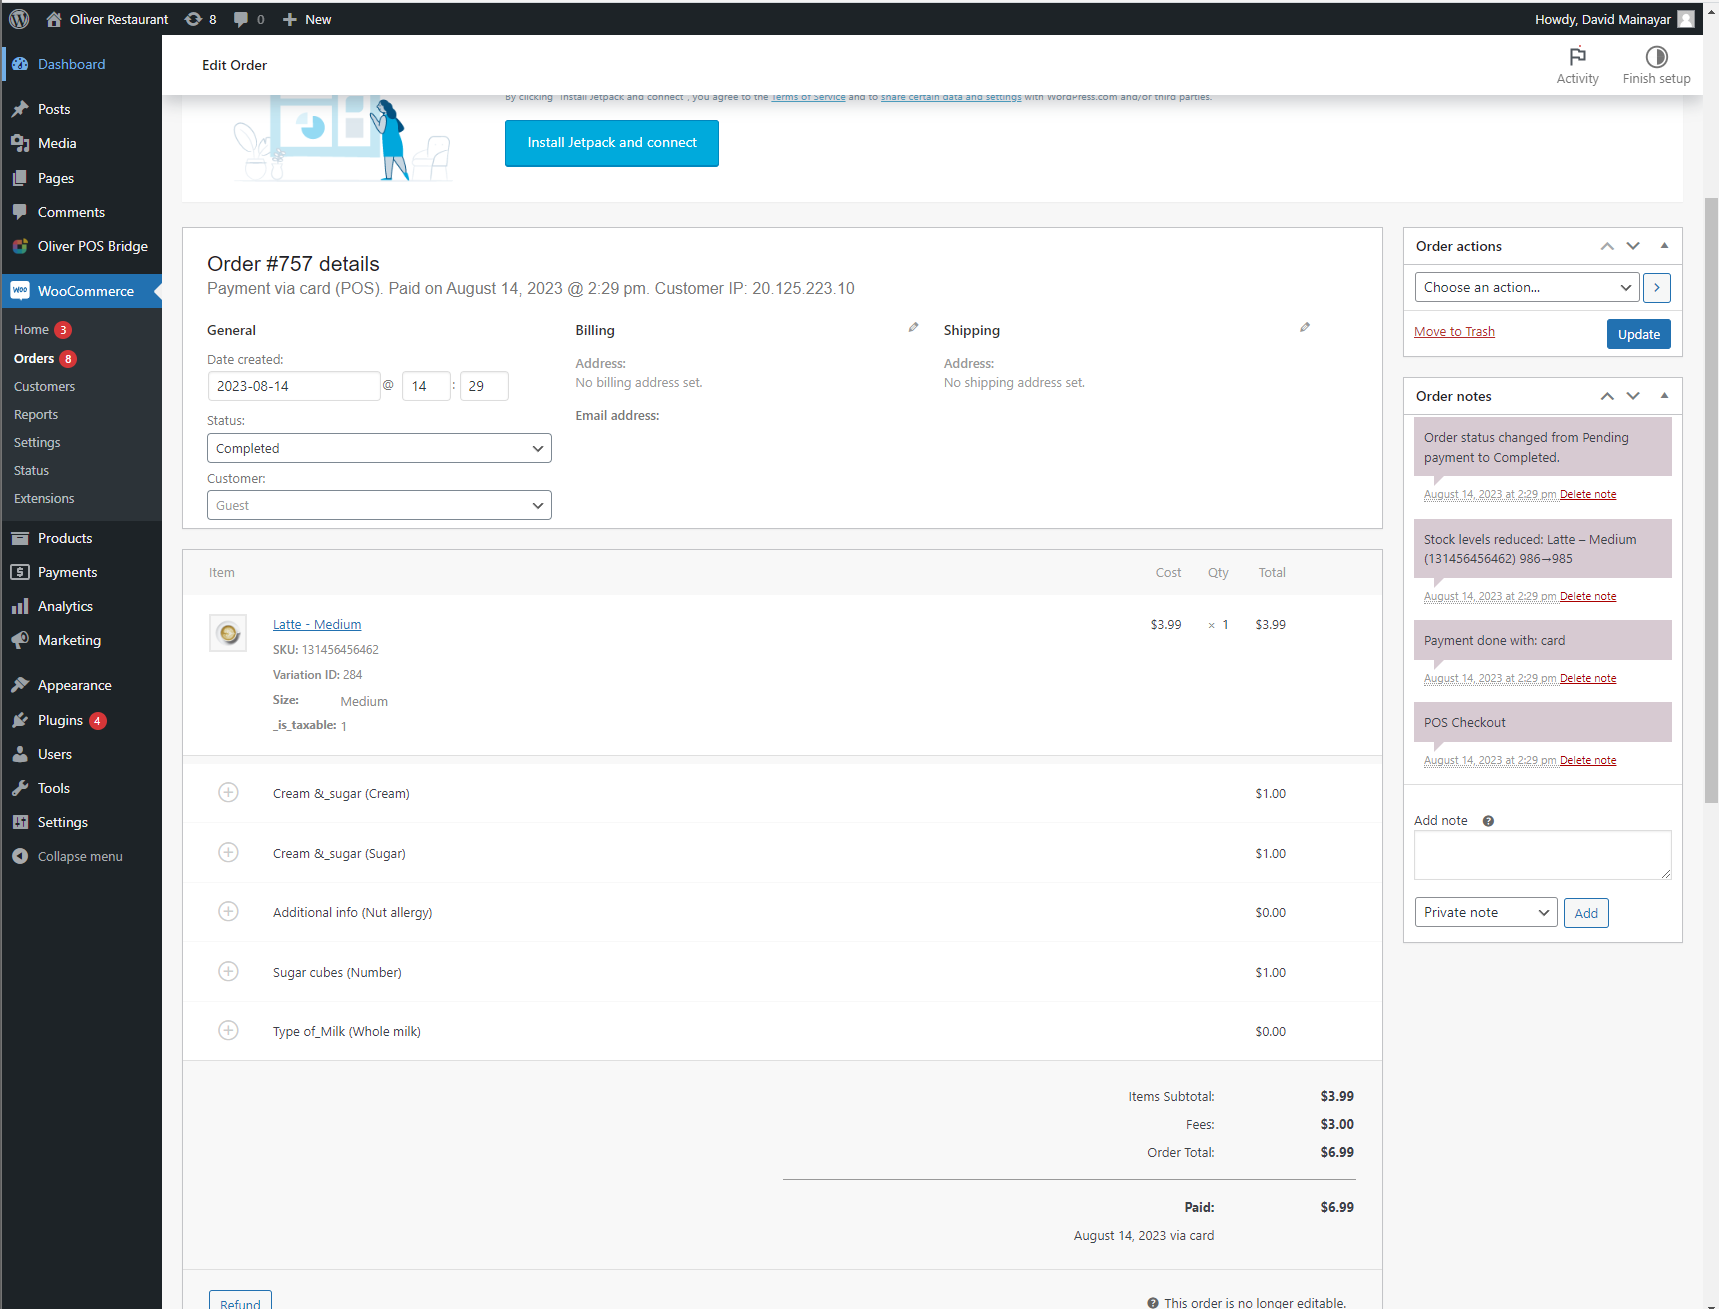
...As well as in the WooCommerce order page, in case you were wondering.
So, as you can see, the sky is the limit with Oliver product modifiers. Please note that you will have to be on the Pro or Enterprise plan to use this feature set.